 English
  English
 русский
 日本語
日本語 Español
 中文简体
中文简体The SANTO UFA range of self-regulating heating cables is mainly used for frost protection of pipes and vessels but can also be used to maintain processes up to 65°C. These heating cables are available...
See DetailsRoof deicing cables are electric heating elements installed along roof edges, gutters, and downspouts to melt snow and ice before it forms damaging ice dams. Each winter, ice dams cost U.S. homeowners an estimated $3.7 billion in roof and interior damage — a figure that underscores why a proactive, affordable solution like deicing cables has become standard practice in cold climates. This guide explains exactly how these systems work, which type suits your roof, and what steps ensure a safe, effective installation.
Content
A roof deicing cable — also called a heat tape or roof heating cable — is a self-regulating or constant-wattage electrical cable that generates heat to prevent ice accumulation on vulnerable roof areas. When snow melts during the day and refreezes at the eaves overnight, it creates an ice dam: a ridge of solid ice that traps water and forces it under shingles, leading to leaks, mold, and structural rot.
Ice dams form because attic heat escapes through the roof deck, melting snow from below. The meltwater travels down to the cold eave overhang — which has no warm attic beneath it — and refreezes. A properly installed roof deicing cable interrupts this cycle by maintaining a drainage channel for meltwater, even when ambient temperatures drop well below freezing.
According to the Insurance Information Institute, water damage and freezing account for nearly one in five homeowner insurance claims. A roof deicing cable system that costs between $200 and $900 installed can prevent claims that average $11,000 or more per incident.
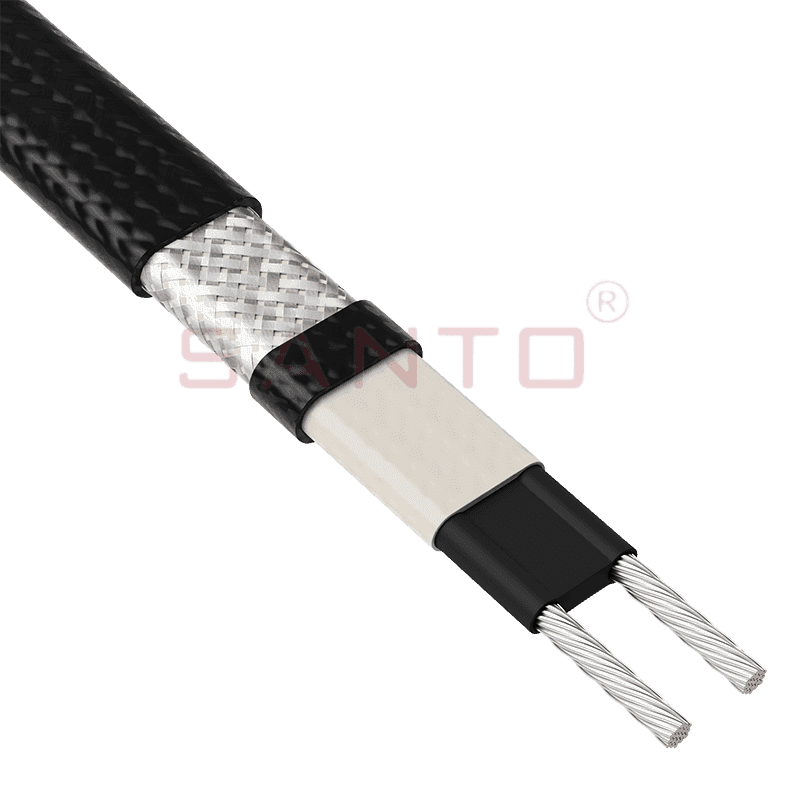
Roof deicing cables work by converting electrical energy into heat, which is conducted directly into the cable's outer jacket and then into the surrounding snow and ice. The science is straightforward, but there are two fundamentally different electrical architectures — and choosing the wrong one can waste energy or, worse, create a fire hazard.
These cables produce the same amount of heat per linear foot regardless of external temperature. They are simple to manufacture and typically less expensive upfront, but they run at full power even on a mild 40 °F day when no ice threat exists. Left unmanaged, constant-wattage roof deicing cables can overheat if overlapped or buried under heavy snow, which is why they must be paired with a dedicated thermostat or timer.
Self-regulating roof deicing cables contain a conductive polymer core whose electrical resistance rises as temperature increases. In practical terms, the cable automatically produces more heat where it is coldest (e.g., inside a frozen gutter) and backs off where it is warmer. This means energy consumption can be 30–50% lower than comparable constant-wattage systems over a full winter season — a meaningful saving given that a 200-foot system may draw 1,000–1,600 watts continuously.
For most homeowners, a self-regulating roof deicing cable offers the best balance of safety, energy efficiency, and long-term value — but constant-wattage options remain competitive for short, simple runs. The table below compares the two types across the criteria that matter most.
| Feature | Self-Regulating Cable | Constant-Wattage Cable |
| Heat Output | Varies with temperature | Fixed watts per foot |
| Energy Efficiency | High (30–50% savings) | Lower |
| Overlap Safety | Safe to cross itself | Risk of overheating |
| Thermostat Needed? | Optional (recommended) | Required |
| Upfront Cost | Higher | Lower |
| Lifespan | 15–25 years | 10–15 years |
| Best For | Complex roofs, long runs, gutters | Simple short eave runs |
Table 1: Comparison of self-regulating vs. constant-wattage roof deicing cables across key performance and cost factors.
The four zones that most urgently require roof deicing cable coverage are the eaves, gutters, downspouts, and roof valleys — in that priority order.
Installing a roof deicing cable is a manageable DIY project for a single-story home, but multi-story or steep-pitch roofs should be handled by a licensed electrician or roofing contractor. Follow these steps for a safe, code-compliant installation.
Measure the total linear footage of eaves, gutters, and downspouts requiring coverage. For the eave zigzag pattern, multiply the eave length by approximately 1.5 to 2 to account for the up-and-down routing. Add the downspout length plus a 12-inch ground lead for each downspout. Purchase 10–15% extra cable to allow for final routing adjustments.
Most residential roof deicing cable systems operate on a standard 120V or 240V GFCI-protected circuit. A GFCI (Ground Fault Circuit Interrupter) outlet is not just recommended — it is required by the National Electrical Code (NEC 426.28) for all outdoor electric deicing systems. Never plug a deicing cable into a standard indoor outlet via an extension cord.
Use manufacturer-supplied roof clips or plastic cable clips rated for outdoor use — never staples or nails, which can penetrate the cable jacket and create a shock or fire hazard. For asphalt shingles, clip tabs slide under the shingle tabs every 12–18 inches. For metal roofs, adhesive-backed or magnetic clips are available.
Thread a single pass of cable along the bottom of the gutter trough and then down through each downspout. Some installers use a continuous run that enters the gutter, exits into the downspout, and returns — creating a complete loop. Ensure the cable end cap is protected from moisture per the manufacturer's instructions.
A dedicated roof deicing cable thermostat cuts power when the temperature rises above freezing, preventing unnecessary energy use. Smart controllers with moisture sensors can reduce operating costs by an additional 20–40% compared to thermostat-only control by activating the cable only when temperature and precipitation conditions coincide.
A typical 200-foot self-regulating roof deicing cable system costs between $15 and $35 per month to operate during peak winter months, depending on local electricity rates and temperature conditions.
| System Size | Cable Type | Avg. Wattage Draw | Monthly Cost* |
| 100 ft | Constant-wattage | 600 W | ~$22 |
| 100 ft | Self-regulating | 350 W (avg.) | ~$13 |
| 200 ft | Constant-wattage | 1,200 W | ~$43 |
| 200 ft | Self-regulating | 700 W (avg.) | ~$25 |
Table 2: Estimated monthly operating costs for roof deicing cable systems. *Based on 12 hrs/day operation at $0.13/kWh (U.S. average, 2025). Self-regulating wattage varies; average assumed.
A well-maintained roof deicing cable system can last 15–25 years, but neglect shortens that lifespan to under a decade and increases the risk of electrical faults. Follow this seasonal checklist to protect your investment.
Roof deicing cables are compatible with virtually every residential roofing material, but installation method and clip type vary significantly by surface.
| Roof Material | Compatibility | Recommended Clip/Mount | Notes |
| Asphalt Shingle | Excellent | Shingle tab clips | Most common; easy to install |
| Metal (Standing Seam) | Excellent | Magnetic or seam clips | No penetration needed |
| Cedar / Wood Shake | Good | Under-shake clips | Consult roofer; uneven surface |
| Clay / Concrete Tile | Good | Loop through tile hooks | Fragile tiles; professional install recommended |
| EPDM / Flat Membrane | Excellent | Adhesive clips | Extended area coverage needed |
Table 3: Roof deicing cable compatibility by roofing material type, with recommended mounting methods.
Q: Can I leave my roof deicing cable on all winter?
A: Self-regulating cables can technically be left powered all season, but using a thermostat controller is strongly advised to avoid unnecessary electrical consumption. Constant-wattage cables should never be left on unattended without a thermostat, as they can overheat in above-freezing conditions.
Q: Will a roof deicing cable damage my shingles or gutters?
A: When installed correctly with proper clips, roof deicing cables do not damage shingles or gutters. Damage occurs when cables are stapled (which punctures the jacket and shingles), when clips fail and cables sag, or when constant-wattage cables overheat due to improper installation. Always follow the manufacturer's installation guide and use approved clips.
Q: How far up the roof should the deicing cable extend?
A: The cable should extend at least 12 inches beyond the exterior wall line — ideally 18–24 inches on very cold or high-snowfall roofs. This ensures the meltwater path extends past the point where re-freezing is likely to occur. In areas with more than 60 inches of annual snowfall, some roofing professionals recommend extending coverage 36 inches above the wall.
Q: Is a roof deicing cable the same as attic insulation for ice dam prevention?
A: No — they address the problem from opposite directions, and the best solution often combines both approaches. Improved attic insulation and ventilation reduce heat loss through the roof deck, reducing the volume of snow that melts in the first place. A roof deicing cable manages the meltwater that does occur by keeping drainage channels open. For severe climates or older homes with poor insulation, using both strategies simultaneously delivers the greatest protection.
Q: Do roof deicing cables require a permit?
A: In most U.S. jurisdictions, adding a new electrical circuit for a roof deicing cable system requires an electrical permit and inspection. Plugging a listed cable into an existing outdoor GFCI outlet may not require a permit, but always check with your local building department. Unpermitted electrical work can complicate homeowner insurance claims and home sales.
Q: Can roof deicing cables be used on solar panels?
A: Specialized under-panel deicing cables exist and are approved for use with most solar array mounting systems, but standard roof deicing cables should not be routed across solar panels. Contact your solar panel installer and the cable manufacturer to confirm compatibility and avoid voiding panel warranties before proceeding with any installation near photovoltaic equipment.
For any homeowner in a region that regularly experiences temperatures below 32 °F combined with snowfall, a roof deicing cable system is one of the highest-return winter investments available. The math is compelling: a complete installation — materials plus professional labor — typically runs $400 to $1,500, while a single ice dam claim averages $4,000 to $15,000 in repairs when mold remediation and ceiling replacement are included.
Beyond direct repair costs, roof deicing cables protect structural elements — rafters, fascia boards, wall framing — that deteriorate silently and expensively over years of repeated freeze-thaw moisture cycles. They also reduce the liability associated with large ice formations that can fall onto pedestrians, vehicles, and adjacent structures.
Choose a self-regulating roof deicing cable for maximum safety and efficiency, pair it with a moisture-sensing smart thermostat, and have the electrical connection reviewed by a licensed professional. Maintain it annually and it will serve your home reliably for two decades or more — quietly protecting every winter storm that arrives.
The SANTO UFA range of self-regulating heating cables is mainly used for frost protection of pipes and vessels but can also be used to maintain processes up to 65°C. These heating cables are available...
See Details
The SANTO UFB range of self-regulating heating cables is mainly used for frost protection of pipes and vessels requiring a higher power output than the UFA heating cables can supply. They can also be ...
See Details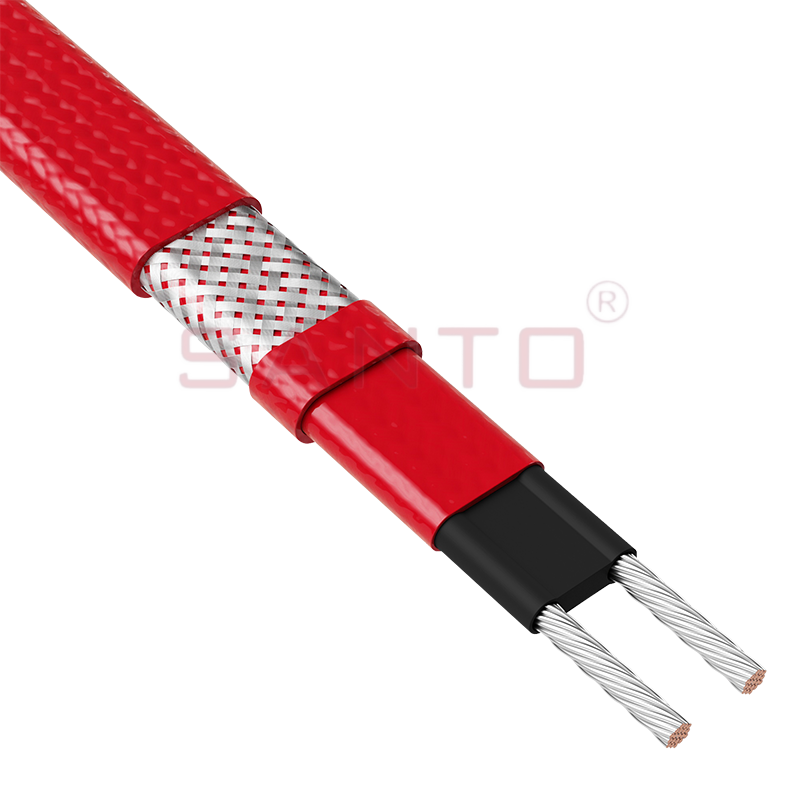
The SANTO UFC range of self-regulating heating cables is used for frost protection of pipes and vessels that require steam cleaning. They can also be used to maintain processes up to 121°C. These heat...
See Details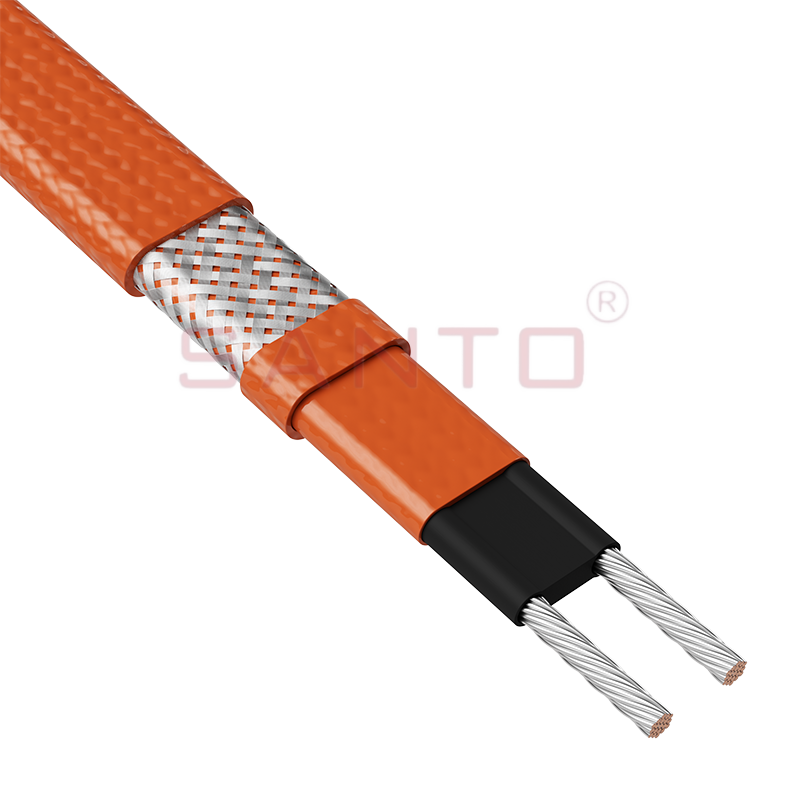
The SANTO UFO range of self-regulating heating cables is mainly used for frost protection of pipes and vessels that require steam cleaning . They can also be used to maintain processes up to 150°C. Th...
See Details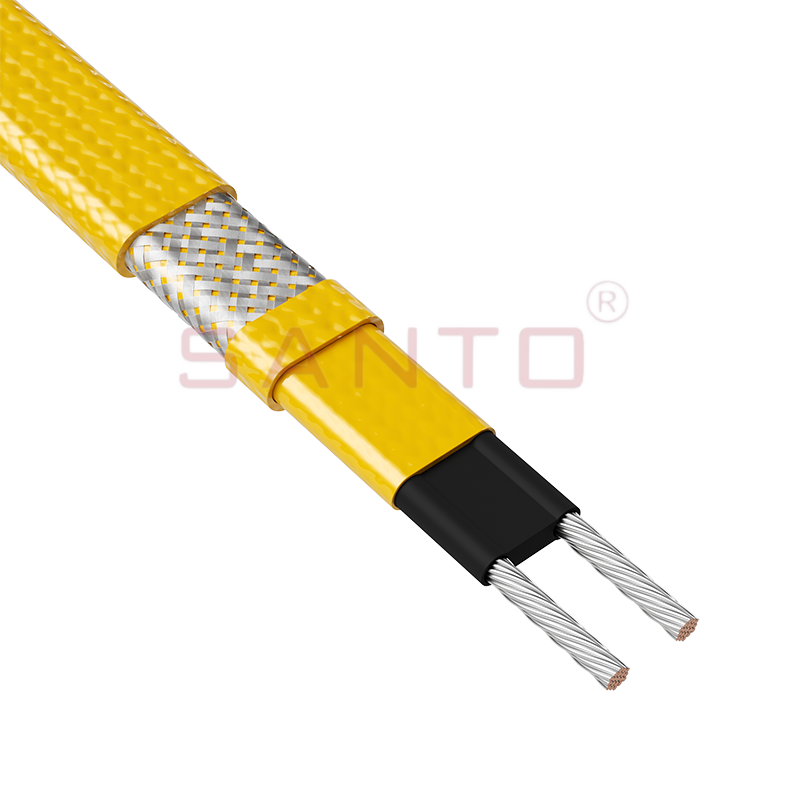
The SANTO UFD series of self-regulating heating cables are mainly used for freeze protection of pipes and vessels, but can also be used to maintain processes up to 200°C. These heating cables are avai...
See Details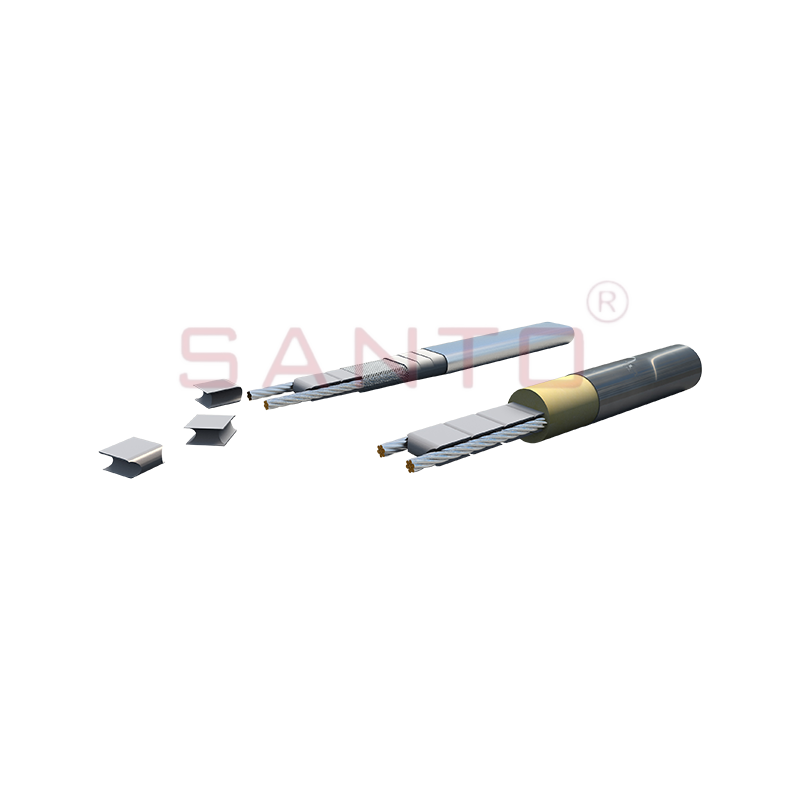
SANTO UFY heating wire is suitable for applications that maintain process temperatures up to 260 ℃ and can be steam blown; The self-regulating and parallel circuit heating wires of the UFY series are ...
See Details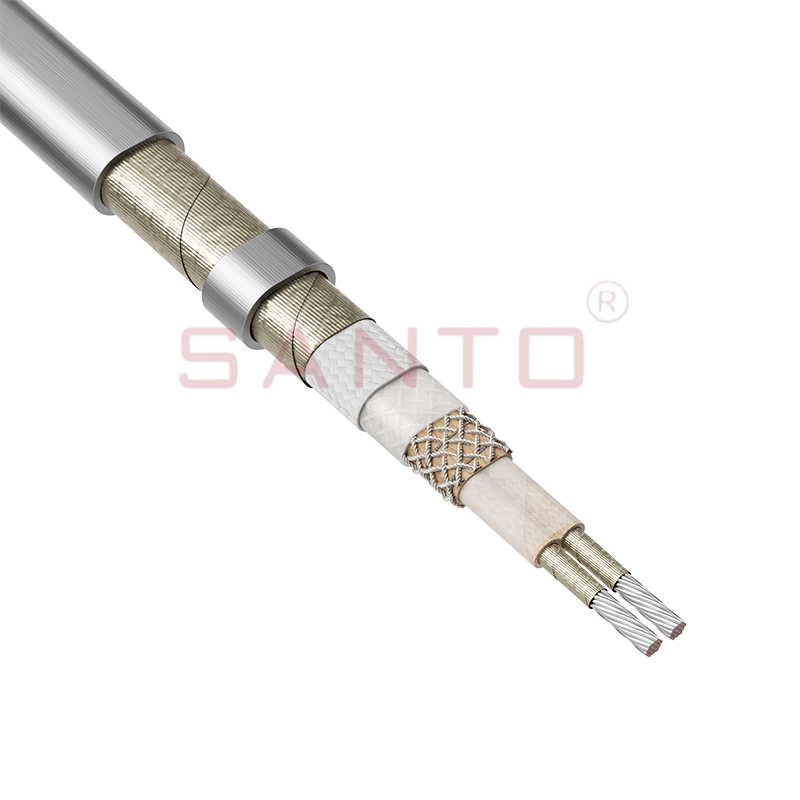
The SANTO UFM series self-regulating heating cables are mainly used for freeze protection of pipes and vessels, but can also be used to maintain processes up to 400°C. These heating cables are availab...
See Details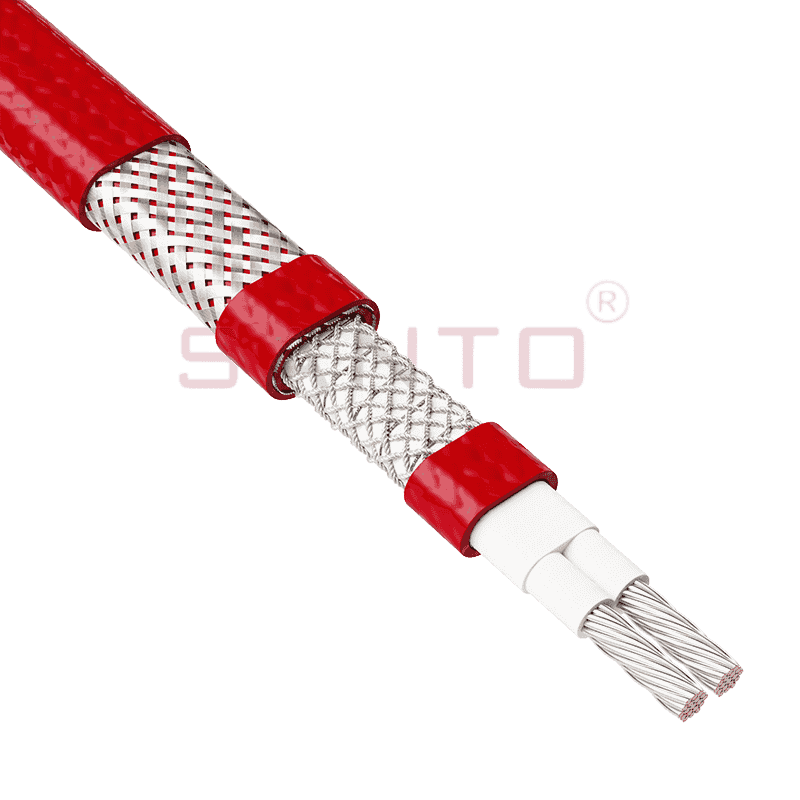
The SANTO ACC range of power-limiting heating cables is mainly used for temperature maintenance of processes and offers the advantage of a high power output at high temperatures which can reduce the n...
See Details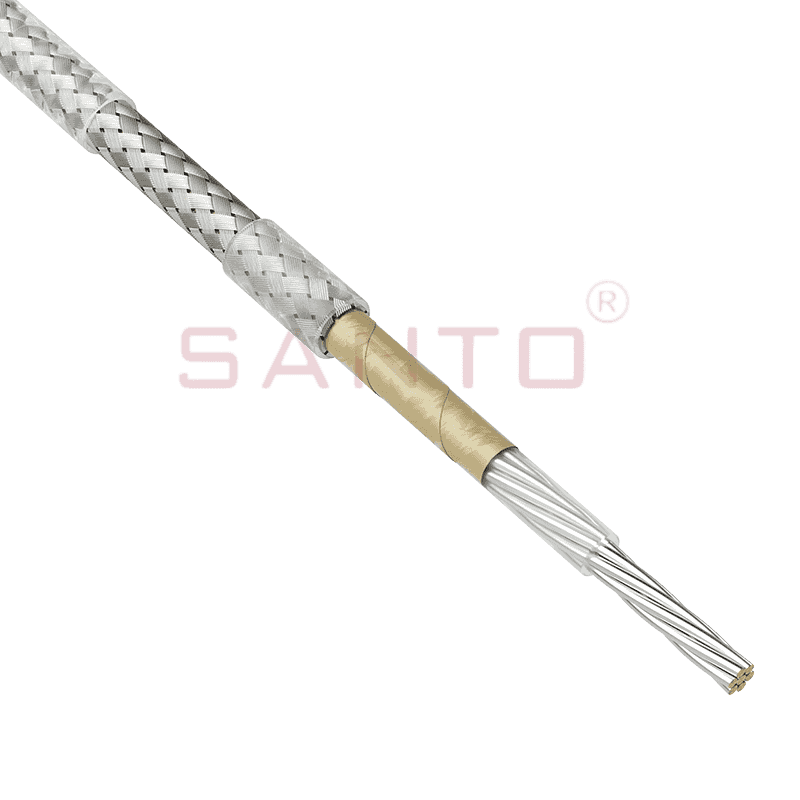
The stranded high temperature conductor is nickel plated to ensure a long life at elevated temperatures in corrosive environments. It is electrically isolated using an innovative sandwich construction...
See Details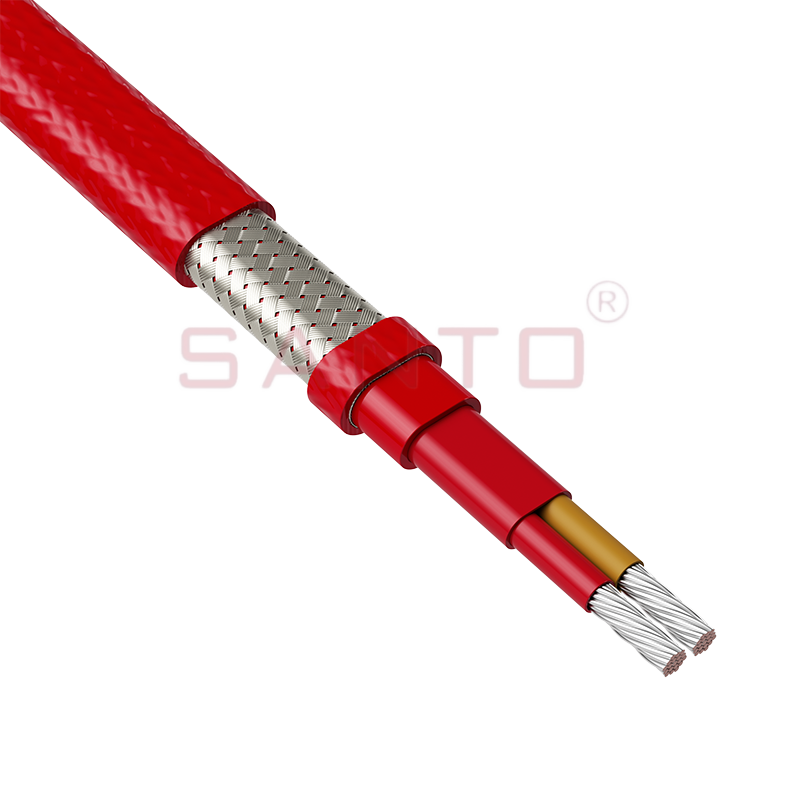
The stranded high temperature conductor is nickel plated to ensure a long life at elevated temperatures in corrosive environments. It is electrically isolated using an innovative sandwich construction...
See Details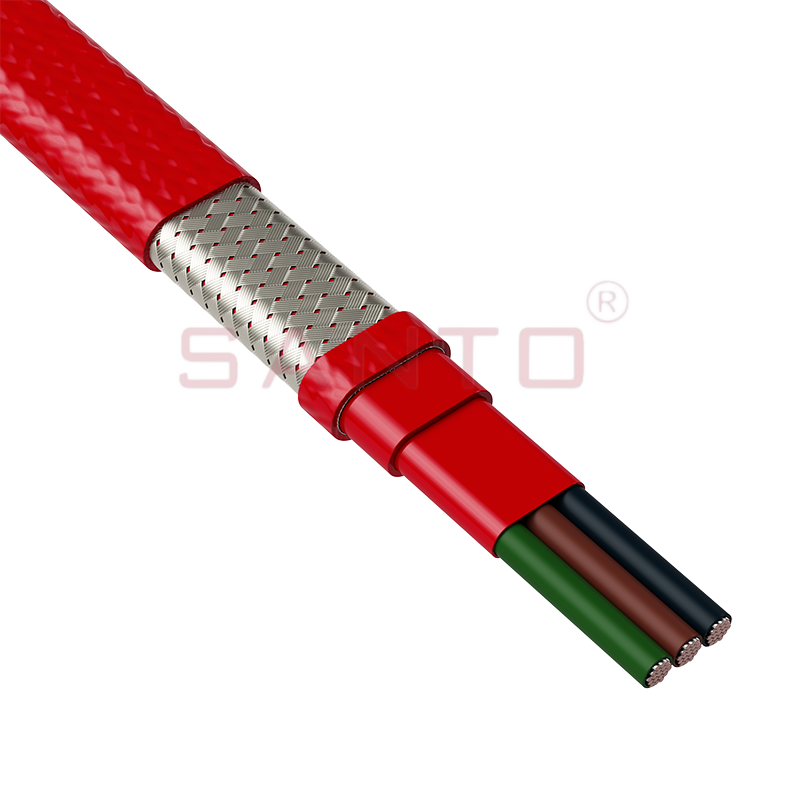
The stranded high temperature conductor is nickel plated to ensure a long life at elevated temperatures in corrosive environments. It is electrically isolated using an innovative sandwich construction...
See Details
SANTO HAx mineral insulated (MI) Alloy 825 series heating cables are suitable for use in hazardous areas. They have been designed for use in freeze protection and temperature maintenance applications ...
See DetailsSanto electric heating strips are widely used in key industries in China.

